Virtual Desktop Guide
Virtual Desktop is a standalone-headset app that streams your PC to your headset: your Windows desktop on giant virtual screens, videos in a home theater, and (with a VR-ready PC) full wireless PCVR. It’s one of the best choice for wireless streaming alongside Steam Link, and this guide covers all the basics you’ll need.
This guide is written around Quest, the headset most readers own, but Virtual Desktop isn’t Quest-only. It also runs on Pico (Neo 3, 4, 4 Ultra), HTC (Focus 3, Focus Vision, XR Elite), Play For Dream MR, and Samsung Galaxy XR. The app, the Streamer, and nearly every setting below work the same everywhere. Only the headset-specific numbers (resolutions, frame rates, codec caps) differ. (Of course features like Face, Eye tracking, etc differ.)
This guide assumes you’re looking for help setting up and using Virtual Desktop, rather than comparing it with other streaming options.
Quick start
- Buy Virtual Desktop from your headset’s own store: the Quest Store, Pico Store, Viveport, or Play Store depending on your device (not on Steam please).
- Install the Virtual Desktop Streamer on your PC and enter your Quest username.
- Install SteamVR if you’ll play Steam games.
- Put on your headset, open Virtual Desktop, and connect to your PC.
- Launch VR games from the Games tab, not from the desktop view for best compatibility.
Prefer to watch it done? There’s a good (a bit old) community-made video walkthrough.
Requirements
- A supported headset: any Quest (1 through 3S), Pico Neo 3 / 4 / 4 Ultra, Vive Focus 3 / Focus Vision / XR Elite, Play For Dream MR, or Samsung Galaxy XR
- A VR-ready PC for PCVR streaming (Meta’s PC requirements)
- A router with 5 GHz Wi-Fi or better
- Ethernet from router to PC. This one is not optional for wireless streaming: it generally works poorly without it, and nobody troubleshooting your setup will look further until the PC is wired. If you can’t wire your existing router to the PC, a dedicated access point near the play space may be the practical alternative.
The last two are wireless-streaming requirements. A USB-C cable or USB Ethernet adapter connection skips the network entirely; see how to get connected.
Common questions
Do I need fast internet? No. Internet speed is irrelevant: streaming happens entirely on your local network. What matters is your router and its connection to your PC. You can be completely offline once you use it at least once. The only exception to this rule is if you are connecting to a cloud/remote computer.
Will my Quest games look better? No. Virtual Desktop streams PC games; it doesn’t change native Quest games. You cannot play standalone games on Virtual Desktop.
Do I need a new router? Not necessarily. Try what you have first: if it does 5 GHz Wi-Fi and your PC is on Ethernet, you may be fine.
I don’t have a Quest. Does this guide still apply? Mostly, yes. Pico, Vive Focus / XR Elite, Play For Dream, and Galaxy XR run the same app with the same tabs and settings. Read Quest-specific tables (resolutions, frame rates, bitrate caps) as Quest numbers; your headset will show its own equivalents in the same places. See device support at a glance for what differs.
Should I buy it on Steam? No. The Steam version of Virtual Desktop is for wired DisplayPort headsets and cannot stream wirelessly. Buy it on your headset’s store. If you already bought it on steam, refund it.
I bought it for one headset. Do I need to buy it again for another? Only if you switch stores. The license is per store, not per headset: buying on the Meta store covers every Quest, and buying on the Pico store covers every Pico. Moving between brands means buying again; there’s no cross-buy.
Which games work? Almost all of them, including plenty that aren’t on the official list. games.vrdesktop.net tracks confirmed compatibility. When a game shows up in the Games tab, launch it from there.
What’s the menu music? The soundtrack is mostly tracks by Test Shot Starfish and Ross Bugden.
How to get connected
There are three ways to link the headset to your PC. Wireless is how most people stream and what the rest of this guide assumes, but Virtual Desktop also has two wired options that take Wi-Fi out of the loop entirely.
Wireless (the default)
No cable to the headset. The stream uses your home or dedicated router. The headset on 5 GHz or 6 GHz Wi-Fi, and the PC wired to the router with Ethernet. That second half is a baseline requirement for reliable streaming and effective troubleshooting. Internet speed is irrelevant since everything stays on your local network.
If your router is too far from the PC to reach with a cable, a small dedicated router next to your play space can solve it.
USB-C cable straight to the PC
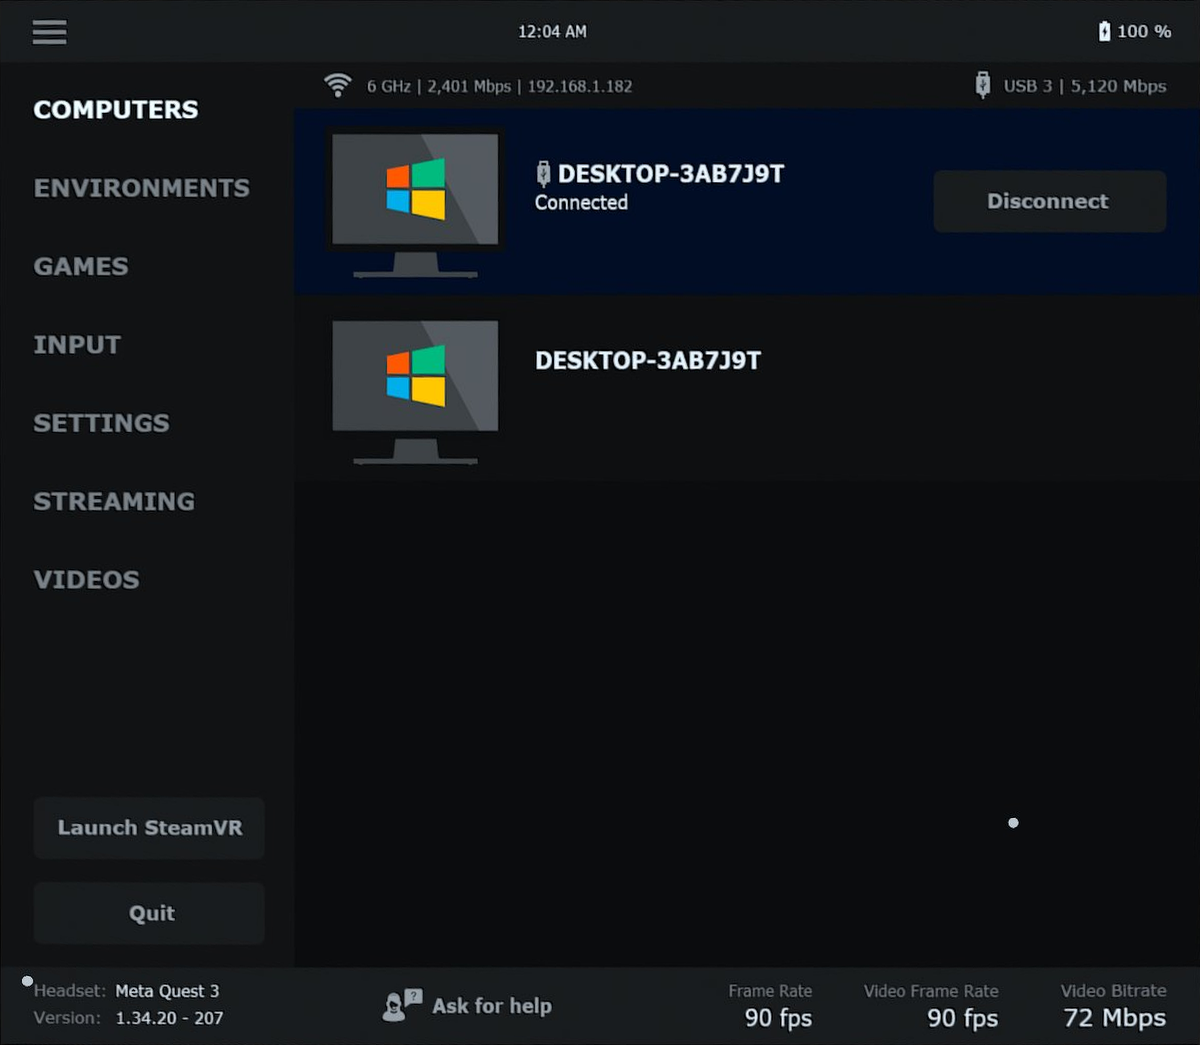
The newest option: plug the headset directly into your PC with a USB-C cable and stream over it, no network involved at all. The USB connection gets its own entry in the Computers tab, marked with a plug icon next to the PC’s name, so the same machine will be listed twice. Once over Wi-Fi and once over USB. Connect to the USB entry. The status bar at the top of the tab shows the USB link alongside your Wi-Fi (USB 3 at 5,120 Mbps on a good cable).
Cable quality decides whether this mode is great or miserable, and USB Controllers, and maybe a little luck! The cheap VR link cables all over Amazon (AMVR, Maxonar, INIU, Syntech, and the like) cause frequent disconnects and periodic hiccups; see Known issues. Use a good USB 3 cable, like the official Meta Link cable, the Anker Fiber cable, the LTT Truespec, or a plain USB 2 cable, which is reliable but limits bitrate to around 150–200 Mbps.
USB support on Quest is currently available in the 1.34.22 beta and requires Quest OS v2.5 or later. In your headset library, long-press the Virtual Desktop tile, select Settings, then Release Channels, and choose BETA. If that doesn’t work, open the Virtual Desktop store page in the Meta phone app, tap the version number, and select the BETA channel. You no longer need a separate beta Streamer; the official Streamer downloaded from the Virtual Desktop website works with this beta.
Quest 3 supports 144 FPS with Quest OS v2.7 or later. The beta also includes a temporary workaround for the Quest 3 FPS-degradation issue by restarting the stream every 15 minutes.
USB-C Ethernet adapter
A USB-C-to-Ethernet adapter plugged into the headset gives you a wired connection with a long reach: no Wi-Fi needed (yay), and the cable run can be as long as your Ethernet cable. It works well enough that plenty of people stream this way daily, but only on headsets that support it: Quest 2 and Quest Pro (on v2.5 or later), Quest 3 and 3S, Pico 4 Ultra, Play For Dream, Galaxy XR, and (surprisingly) Vive Focus 3 and Focus Vision. Other headsets ignore the adapter.
What matters when picking an adapter:
- Chipset is what matters most. Realtek works: RTL8153 (gigabit) or RTL8156 (2.5 GbE). ASIX chipsets don’t: they drop the connection the moment streaming starts. The 5/10 GbE Realteks (RTL8157/8159) aren’t supported either.
- Get a version with Power Delivery passthrough so the headset charges while you play. Most claim to support 100W, but you only need 21w for a quest. More is not an issue.
- Run the distance as Ethernet, not USB. USB 3 is only rated to about 3 m, so keep the USB-C leg short and let the Ethernet cable do the long run (or use a fiber-optic link cable). Avoid slim or flat USB-C cables over 2 m.
The adapter can plug into your router like any wired device, or straight
into the PC using Windows Internet Connection Sharing, though a cheap
2.5 GbE switch is more stable than ICS. ICS can be a bit tricky to keep
working well. On Quest 2 and Quest Pro it just works as long as the headset
is on v2.5 or later; only headsets stuck on older software need developer
mode plus one adb command (adb shell setprop debug.usb.ethernet.enabled 1).
Don’t expect the headset to show any of this, there’s no indication it’s on
Ethernet but it will work as expected.
Getting started
Everything installed? Put the headset on and open Virtual Desktop. Your first session goes like this.
Connect from the Computers tab
The app opens on the Computers tab: every PC running the Streamer, with your Wi-Fi band (2.4/5/6 GHz), connection speed to the router or USB, and IP address alongside. Select your PC and you’re connected.
This tab is also your first stop whenever streaming has issues, check here before touching anything else. If the headset is on 2.4 GHz, or your PC isn’t on Ethernet or USB, nothing else in this guide will save you.
Get comfortable at your desktop
Connecting puts you in front of your Windows desktop on a big virtual screen, with your controllers acting as a mouse. Three controls are enough for a first session:
- Hold the grip button to move and resize the screen.
- Click above or below the screen for the control bars: view adjustments above; virtual keyboard, monitor switching, and more below.
- Press the left menu button to bring the Virtual Desktop menu back up (Computers, Games, Settings).
If you need more, the full tour of the screen controls is in The desktop view.
Launch your first game
PCVR games launch from the Games tab, not from the desktop view. It lists your SteamVR and Meta PC titles and picks the best runtime for each automatically. However, games from other platforms won’t appear here, and you can’t add custom entries to the list.
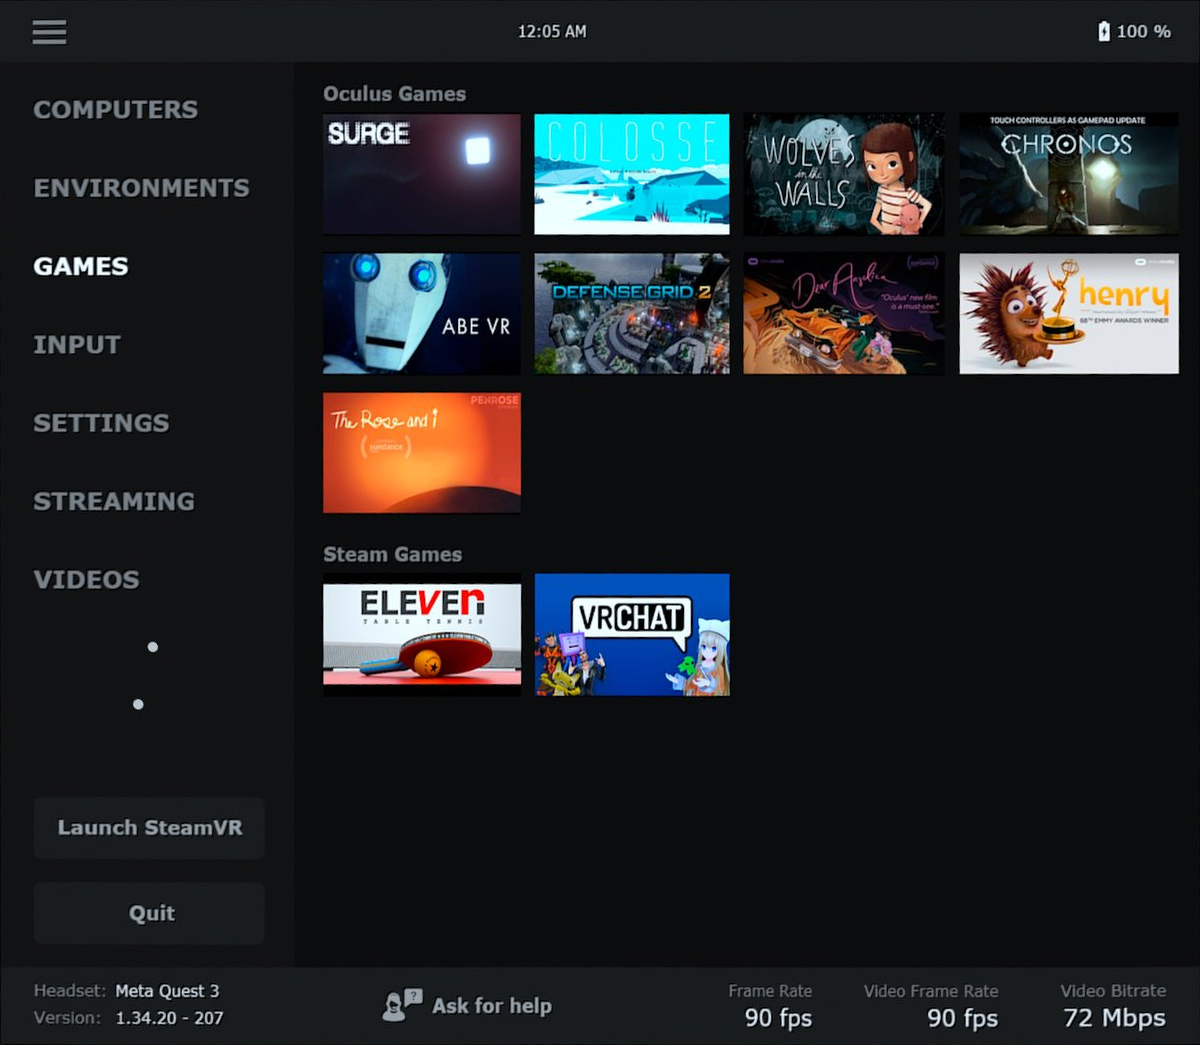
Games that aren’t listed can still be played. OpenVR and OpenXR titles
just launch normally: start them from the desktop and SteamVR (or VDXR)
picks them up, no tricks needed. Oculus-API (Not OpenXR) titles are the ones that need
help: on the PC, right-click the Streamer’s tray icon and choose Launch
game, then browse to the game’s executable. (For a reusable shortcut on a
.bat file that calls
"C:\Program Files\Virtual Desktop Streamer\VirtualDesktop.Streamer.exe"
with the game’s path does the same.) Even so, launch from the Games tab
whenever a game appears there; it’s the most compatible path.
Input settings
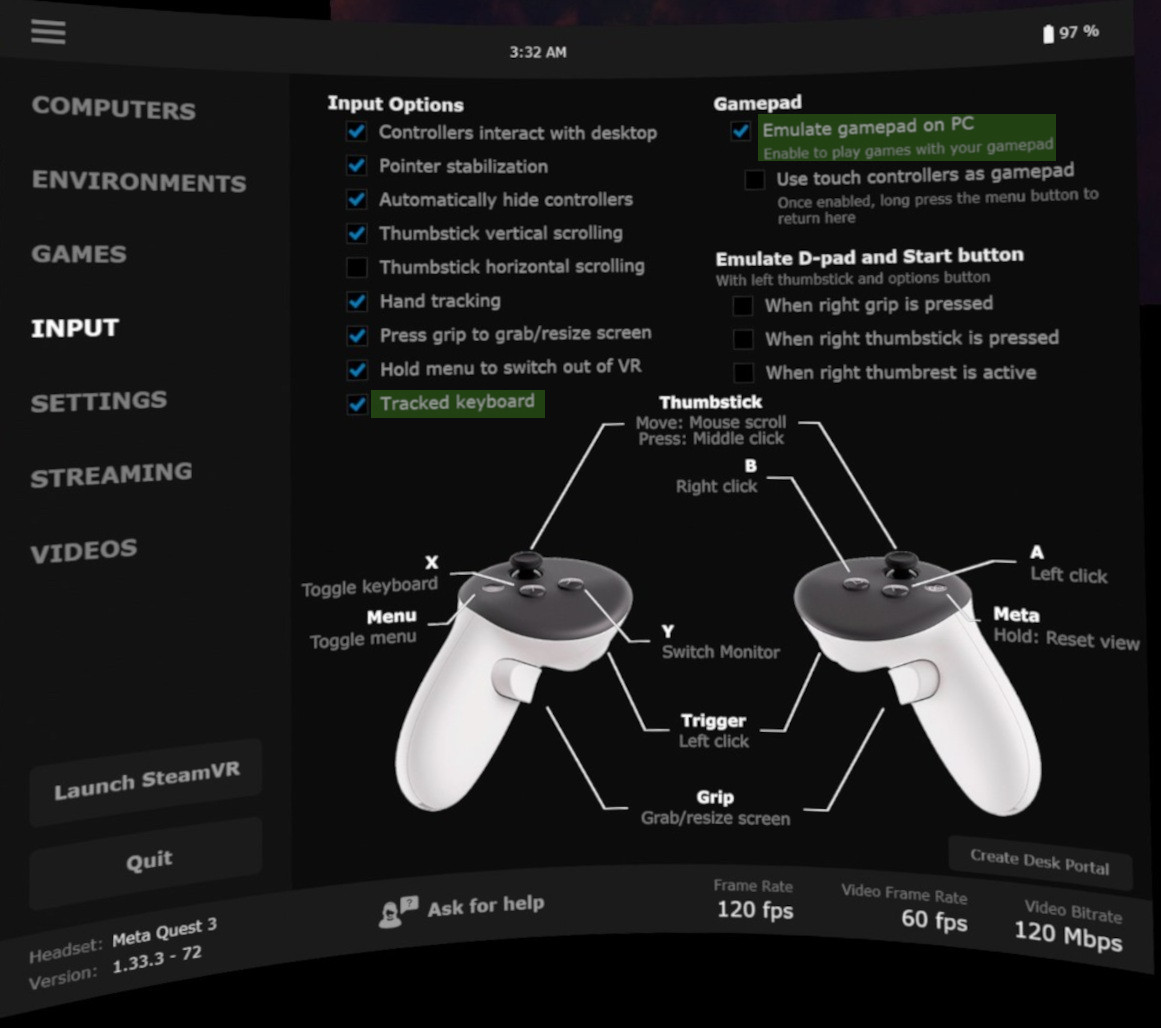
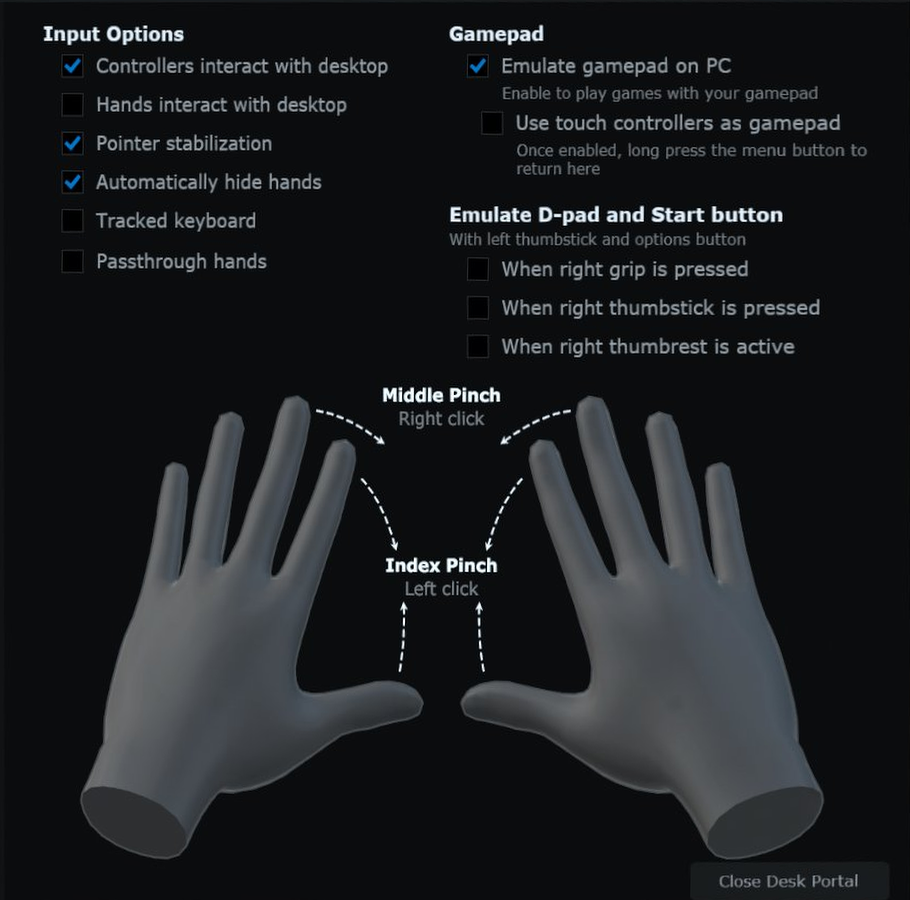
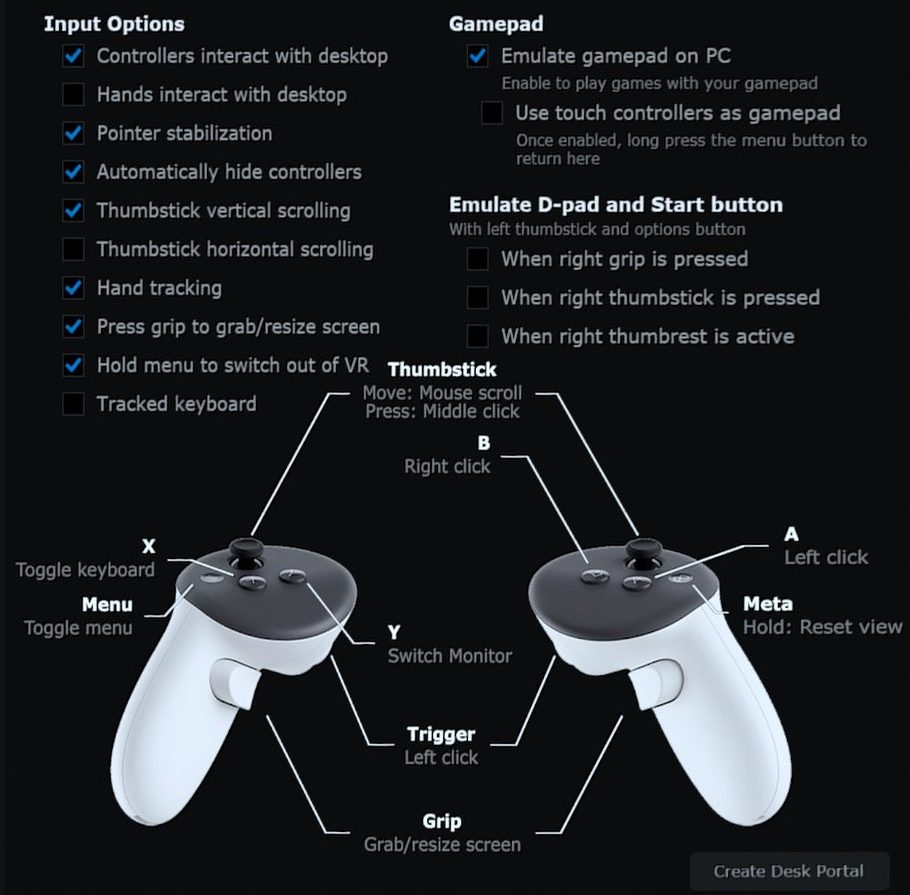
The Input tab controls how you point, click, and type, whether that’s with controllers, bare hands, or a physical gamepad.
Shared settings (apply to both controllers and hand tracking):
- Tracked Keyboard — passthrough view of supported tracked keyboards.
- Emulate Gamepad on PC — use a Bluetooth controller to play flat games.
Hand tracking mode lets you work the desktop with bare hands, auto-hides them when inactive, and can show a passthrough border around your hands (not adjustable currently).
Controller mode:
- Controllers interact with desktop — Quest controllers as a virtual mouse.
- Pointer stabilization — damps controller shake on desktop.
- Automatically hide controllers — worth keeping on unless you need it.
- Thumbstick scrolling — scroll with the stick.
- Hand tracking handoff — switches to hands when controllers sleep.
- Grip button — hold to move and resize virtual screens.
- Hold menu — hold (or double-tap) to exit VR mode quickly. (needs confirmation)
- Create Desk Portal — a passthrough window onto your physical desk; there’s a short setup video if it’s not clear.
Desktop settings
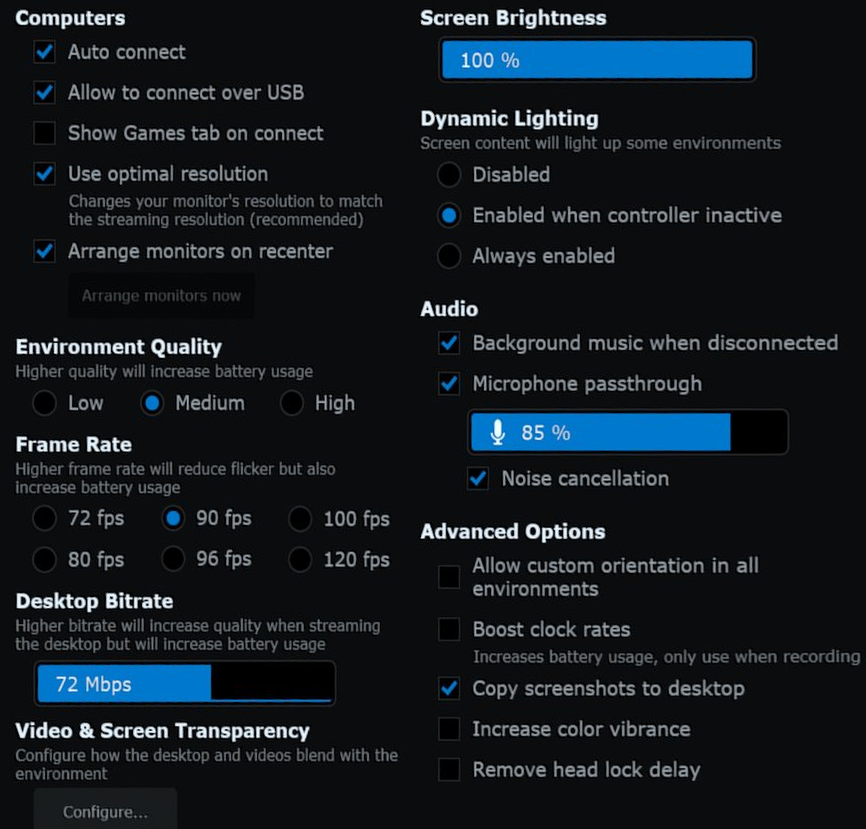
These are the Settings-tab options for everyday desktop use. This does not control VR streaming. Game streaming quality lives in the next section.
General
- Auto Connect — off means Virtual Desktop always asks which PC at launch.
- Show Games Tab on Connect — jump straight to the launcher instead of the desktop. Otherwise the menu will vanish a few seconds after connect.
- Screen Brightness — affects the desktop screen only.
- Frame Rate — the desktop screen’s frame rate; higher reduces flicker but uses more battery. VR games use the separate frame rate in the Streaming tab. This can go up to max on a virtual display, your main monitor is limited by what it supports.
- Dynamic Lighting — screen content lights up some environments.
- Audio — boot music and microphone passthrough; noise cancellation runs on the headset.
Advanced
- Custom Environment Orientation — rotate environments during monitor use (not compatible with Meta’s lying-down mode for the few that still have that feature).
- Boost Clock Rates — runs the headset’s clocks higher at the cost of battery; useful when recording video. Can reduce stutters when recording.
- Copy Screenshots to Desktop — mirrors screenshots to the folder set in the Streamer’s Media tab (videos excluded, but you can get those from Meta Gallery).
- Increase Color Vibrance — toggles between REC.2020 and REC.709 color. You can find more information on this if you want to know here
- Remove Head Lock Delay — makes a head-locked screen (see The desktop view) follow your head instantly instead of easing along behind it.
Multi-monitor support
| Headsets | Maximum monitors | Single-monitor resolution | Per-monitor resolution with multiple monitors |
|---|---|---|---|
| Quest 3 / 3S, Pico 4 Ultra, Play For Dream, Galaxy XR | 3 | up to 3840×2160 | up to 2560×1440 |
| Quest 2 / Pro, Pico Neo 3, Pico 4, Vive Focus 3, Vive XR Elite | 2 | up to 2560×1440 | up to 1920×1080 |
| Quest 1 | 1 | up to 2560×1440 | — |
Use Optimal Resolution locks resolution to what the headset display can actually show; uncheck it to use your monitor’s native resolution instead. This may not always scale well.
The monitor stream has a maximum bitrate of 120 Mbps, shared between all active monitors:
| Active monitors | Bitrate per monitor |
|---|---|
| 1 | 120 Mbps |
| 2 | 60 Mbps |
| 3 | 40 Mbps |
You can mix physical and virtual monitors. For example, Quest 3 and 3S can display two physical monitors and one virtual monitor for a total of three.
Multi-monitor support depends on available graphics power and is automatically disabled when no hardware video encoder is present.
Streaming settings
The tables in this section list Quest values. other headsets offer the same quality tiers and codecs at their own resolutions and caps.
VR graphics quality
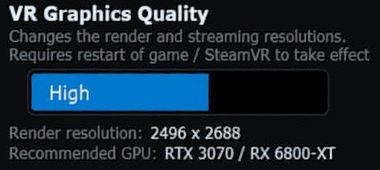
Pick the level that matches your GPU. Rendering and encoding both land on it, so start low and move up:
| Level | Minimum GPU | Quest | Quest 2 / 3S | Quest Pro / 3 / Galaxy XR |
|---|---|---|---|---|
| Potato | GTX 970 / RX 580 | 1200×1344 | 1344×1440 | 1344×1440 |
| Low | GTX 1070 / RX 5500 XT | 1536×1728 | 1728×1824 | 1728×1824 |
| Medium | RTX 2070 / RX 5700 XT | 1824×2016 | 2112×2304 | 2112×2304 |
| High | RTX 3070 / RX 6800 XT | 2208×2400 | 2496×2688 | 2496×2688 |
| Ultra | RTX 3090 / RX 6950 XT | — | 2688×2880 | 2688×2880 |
| Godlike | RTX 4090 / RX 7950 XT | — | — | 3072×3264 |
| Monster | — | — | — | 3648×3936 (Galaxy XR) |
| Rampage | — | — | — | 4224×4608 (Galaxy XR) |
Resolutions are per eye. Pico 4 Ultra adds a Monster tier, while Galaxy XR and Play For Dream add Monster and Rampage tiers above Godlike.
Encode resolution is fixed at two-thirds of render resolution and can’t be changed.
Frame rate
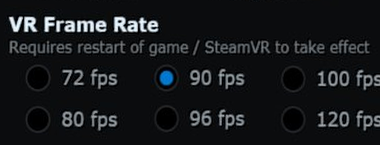
The Streaming tab’s VR Frame Rate applies to VR games. the desktop screen has its own separate frame rate in the Settings tab. Available rates depend on the headset: Quest 1 does 60–72 Hz, Quest 2 60–120, Quest Pro 72–90, and Quest 3 72–120. Changing it requires restarting the game or SteamVR.
Bitrate and codecs
Bitrate is the quality/latency trade: higher looks better but adds small amounts of additional latency, lower compresses more but responds faster. Play with codecs and find what you like! there is no ‘best’.
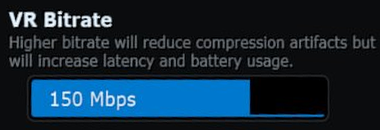
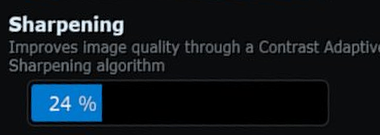
The codec is chosen in the Streamer app’s Video section. Automatic is the right default.
| Codec | Quest 3 max | Quest 2/Pro max | Notes |
|---|---|---|---|
| H.264 | 200 Mbps | 150 Mbps | Lowest latency, least efficient |
| H.264+ | 500 Mbps | 400 Mbps | Good for racing and fast-paced games; needs an ideal network |
| HEVC | 200 Mbps | 150 Mbps | More efficient than H.264 |
| HEVC 10-bit | 200 Mbps | 150 Mbps | Better color gradients; best for darker, slower games |
| AV1 | 200 Mbps | — | Most efficient, technically. Needs an RTX 4000 / RX 7000-class GPU |
Quest 1 sits below all of these: it caps VR bitrate at 100 Mbps, on H.264 or HEVC only.
Known issue: AV1 and HEVC on NVIDIA GPUs can sometimes spike frame times at high bitrates; see Known issues for the workaround.
Passthrough
These options blend a VR game with your real room (at frame rates up to 90 FPS): environment passthrough, your tracked keyboard, your hands, or a desk portal (set the portal up from the bottom-right of the Input tab). This is not available on a lot of devices due to missing OpenXR extensions, Quests support it.
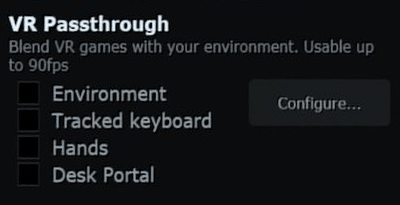
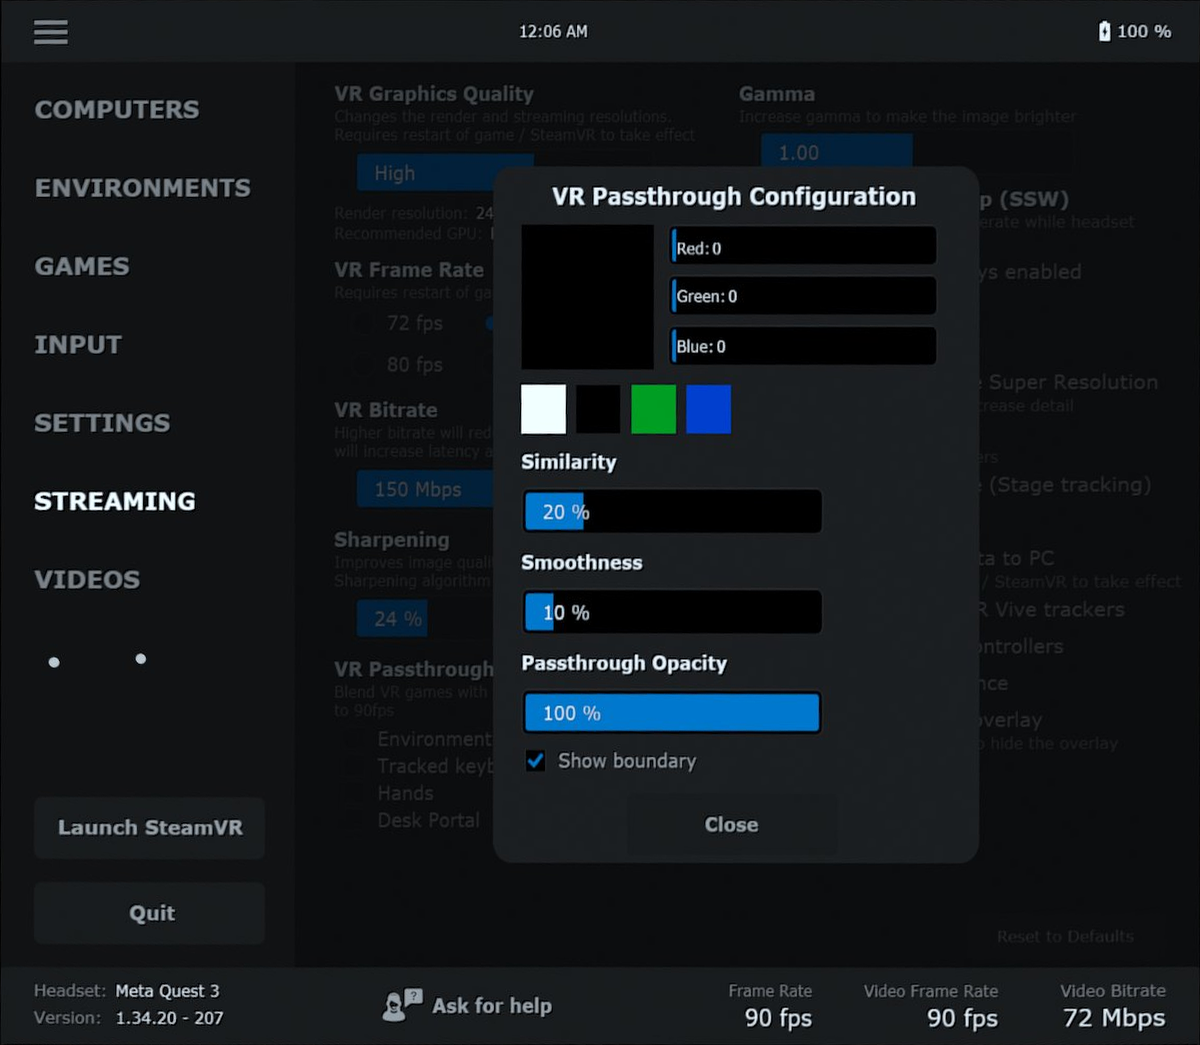
A configuration panel fine-tunes the chroma-key effect: RGB values to match the color you’re keying out, similarity and smoothness for edge detection, overall passthrough opacity, and a boundary-visibility toggle.
Gamma
Default is 1.00. raise it (or lower) to adjust games brightness.
If the whole desktop looks too dark, check Screen too dark.
Advanced options
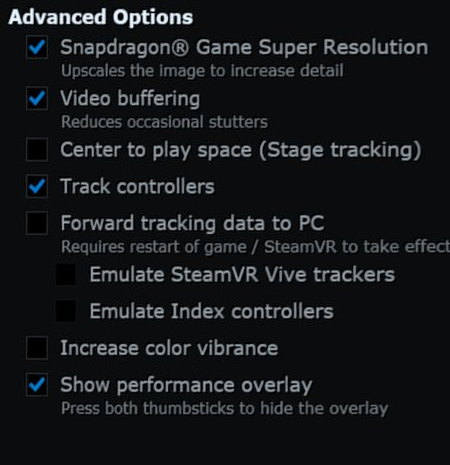
- Snapdragon Game Super Resolution — upscaling done on the headset after the stream arrives, for a sharper image at no PC cost (some extremely minor battery drain). On the newest headsets (Quest 3, Pico 4 Ultra, Play For Dream MR, Galaxy XR) it works at every quality level; on older ones it only engages up to High at 90 Hz. One issue: except on Quest 3, SGSR and chroma-key passthrough can’t be on at the same time.
- Video buffering — smooths occasional stutter by buffering one frame. Leave it on. Please.
- Center to play space — for MixedVR rigs (Vive trackers, Index controllers, etc) using stage tracking.
- Track controllers — Leave enabled unless you have a specific reason. This is good for people who use Index controllers.
- Forward tracking data to PC — enables the body/face/eye tracking features below.
- Increase color vibrance — the same REC.2020/REC.709 toggle described under Desktop settings.
- Video nominal range — switches between the two nominal ranges the headset supports.
- Show performance overlay — real-time diagnostics (hide it by clicking both thumbsticks); see reading the performance overlay for what it all means. It cannot be moved.
Synchronous Space Warp (SSW)
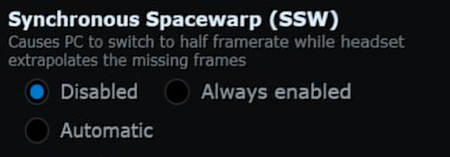
Virtual Desktop uses Qualcomm’s SSW, available on any XR2-class headset or newer (everything except the original Quest). It halves the rendering load on your PC by extrapolating every other frame on the headset. So if your PC can only manage 45 FPS, SSW fills in the gaps to keep a smooth 90. The trade-off is artifacts (warping, straight lines bending), so when your PC can hold full frame rate, let it if it doesn’t bother you. Don’t confuse it with DLSS interpolation as SSW extrapolates, which reduces perceived latency rather than adding to it.
With SSW in play, set the refresh rate as high as you can: if your PC manages 60–70 FPS, run at 120 Hz.
Disabled means no reprojection, Auto kicks in only when your PC can’t hold frame rate, and Always forces it on, useful for games you know will always drop frames.
Always has an added benefit: the stream keeps its full bitrate, instead of losing half the effective bitrate.
Body, face, and eye tracking
Inside-out body tracking (IOBT) forwards Meta’s built-in body estimation to your PC; VRChat is where most people use it (and where it actually works). Two switches in the Streaming tab have to be on for it to work: Forward tracking data to PC and Vive Tracker Emulation.
What you get depends on the headset. Every Quest except the original supports it: Quest 3/3s does camera-based upper-body tracking with estimated waist and legs (feet don’t track sadly), while Quest 2 and Quest Pro estimate a full body from head and hand positions. On Pico 4 and Pico 4 Ultra, body tracking comes from Pico Motion Trackers instead (Optional accessory).
IOBT coexists with Slime or Vive trackers, and individual virtual trackers can be disabled by setting them to “Held in Hand” or with DenTech’s configuration tool. Out of the box Virtual Desktop exposes trackers that would not co-exist with this well.
Eye and face tracking (Quest Pro, Play For Dream MR, Galaxy XR): on Quest Pro, enable “Natural Facial Expressions” and calibrate “Eye Tracking” under Movement settings in the Quest OS, then enable “Forward tracking data to PC” in Virtual Desktop and confirm the prompt. For VRChat, pair it with VRCFaceTracking.
Eye tracking only (Pico 4 Pro, Pico 4 Enterprise, Vive Focus Vision, Vive XR Elite): these forward eye tracking to the PC through the same “Forward tracking data to PC” switch, but none of them do face tracking, so expect eye movement without expressions.
The desktop view
Two control bars live around the virtual screen:
Above the monitor (click or pinch above the screen; visible in skybox and passthrough environments): head lock, transparency for black, reset view, and adjusters for height, distance, curve, and size.

Below the monitor (click or pinch below the screen): SBS video modes (half SBS, full SBS, over-under, anaglyph), seat switching in supported environments, switching which screen the primary monitor shows, adding and removing virtual monitors (Quest 2 and newer), and the virtual keyboard (also on the A button).

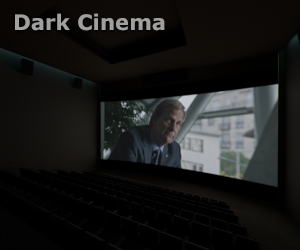
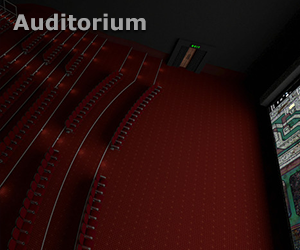
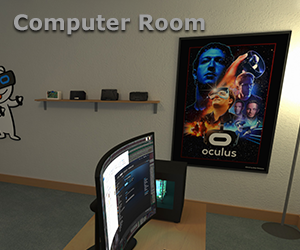
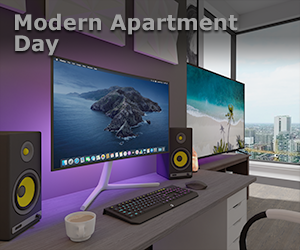
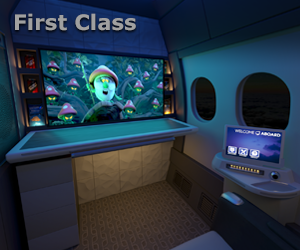
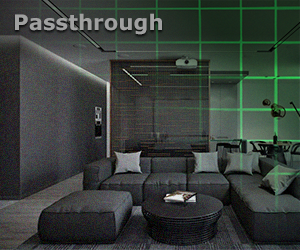
Environments
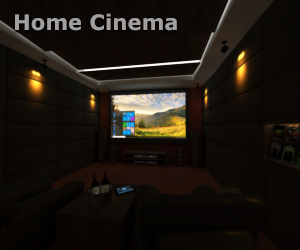
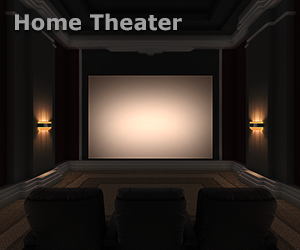
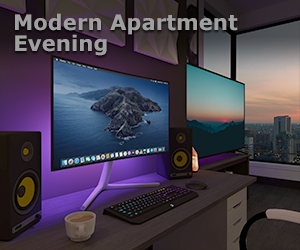
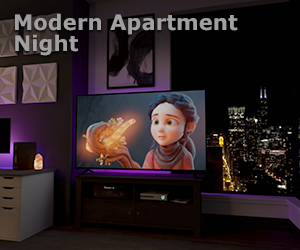
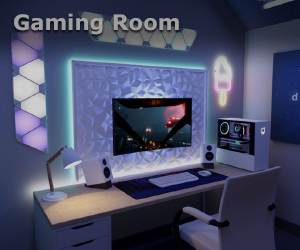
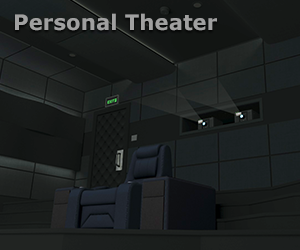
The virtual space around your screens, chosen from the Environments tab. These are fully rendered on the headset itself. Options range from minimal voids through skyboxes to fully modeled rooms, plus full passthrough of your real room. If your looking to use a non standard monitor, pick one of the voids or basic scenes.:




The Streamer app
The PC-side streamer has a lot of buttons and toggles.
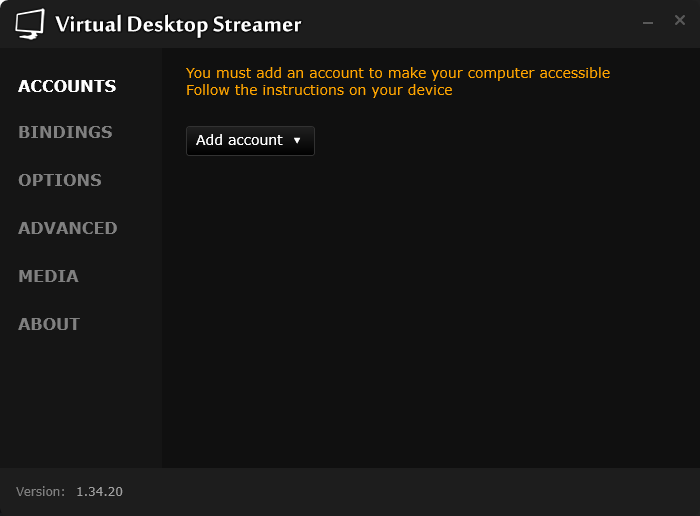
Accounts — add up to four usernames per platform (Meta, Pico, Viveport). Quest usernames aren’t case-sensitive but Pico usernames are.
Keyboard bindings — Shift+Win+A switches which physical monitor your VR screen shows; Shift+Win+D toggles VR mode on and off. ADD THE PHOTO IDIOT
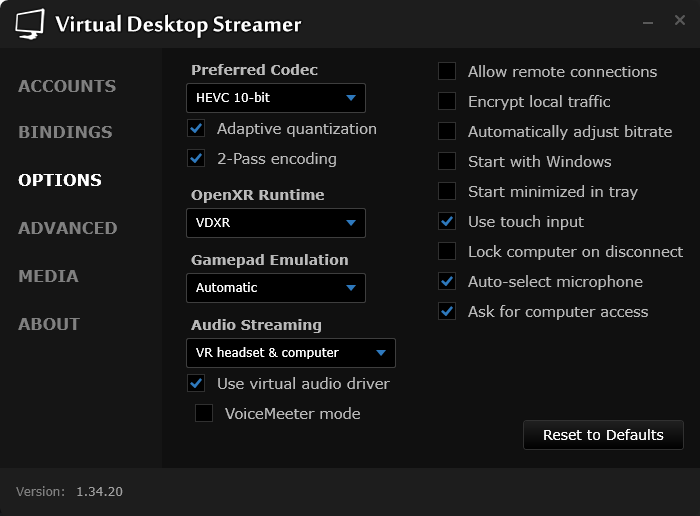
Video — codec choice (see the table above), plus:
- Adaptive Quantization — reduces compression artifacts in dark scenes; 10-bit codecs only, and worth enabling. Most modern GPUs handle it fine.
- Automatic Bitrate — runs a 10 MB speed test on first connection to find your stable maximum. Keep it on, with two exceptions: some Wi-Fi 6E networks and USB Ethernet connections behave better with it disabled.
Audio — output to the computer only, headset only, or both. With “headset only” selected you can enable VoiceMeeter mode, which restricts audio to the Virtual Desktop Audio device for custom routing through VB Audio’s VoiceMeeter.
Game settings:
- Runtime — VDXR (Virtual Desktop’s native OpenXR runtime) is the recommendation: better performance, and SteamVR doesn’t need to run. SteamVR and Automatic are there when a game demands them.
- Gamepad emulation — Automatic, Xbox, or PlayStation layouts, for controllers connected to the headset.
- Boost Game Priority — raises the game’s Windows process priority. Helps some titles (Flight Simulator, DCS), hurts others. Turn it off if a game gets laggier or Virtual Desktop freezes and/or hitches.
System settings:
- Allow remote connections — streaming from outside your network. Needs UPnP enabled on your router (the Streamer forwards ports automatically); without UPnP, forward TCP 38810, 38820, 38830, and 38840 manually. All remote traffic is end-to-end encrypted. Turning this off can also fix connection issues on some router setups.
- Encrypt local traffic — rarely needed on a home network. It’s there if you need it but expect some bitrate issues.
- Ask for computer access — approval prompt for first-time devices. Another personal preference security option.
- Lock computer on disconnect — secures the PC when your session ends.
- Launch options: start with Windows, start minimized, and use touch input, which uses a touchpad input instead of mouse on the desktop.
If you’ve changed something and can’t remember what, Reset to Defaults restores the Streamer’s original settings. They are pretty good out of the box.
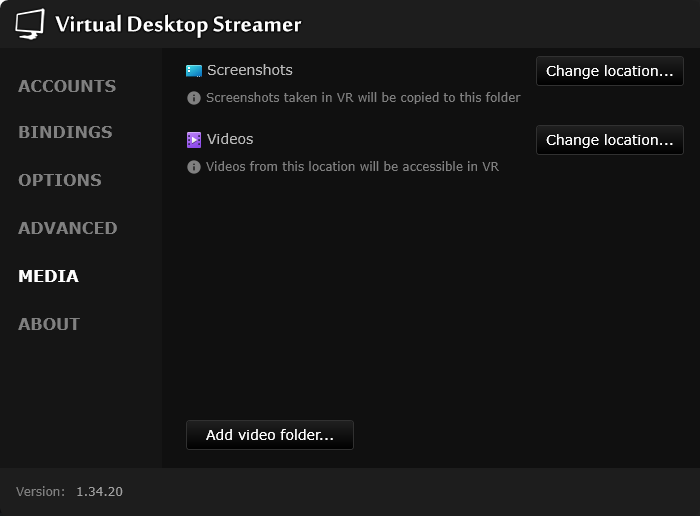
Media — where screenshots go (Desktop folder by default) and which video folders are browsable in VR. add as many as you like. You can use symbolic links here as well.
One thing to note, as Virtual Desktop often auto starts as an elevated service, if you use an SMB Share it may not show up. The solution to that is to restart the streamer and it should show your folder options.
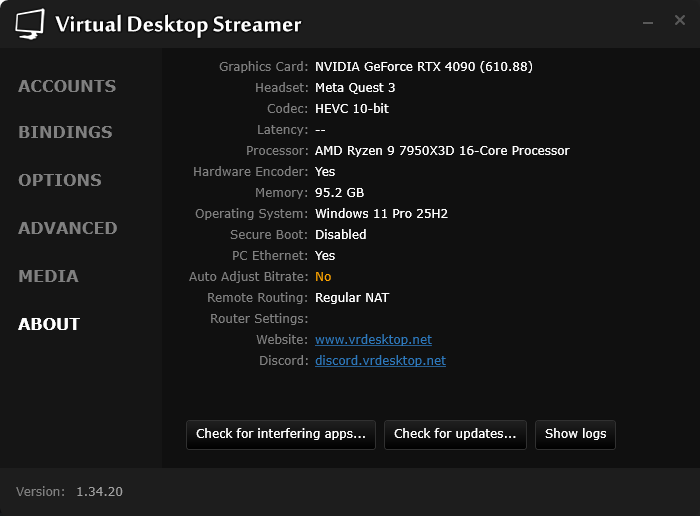
About — your hardware, encoder status, and network configuration at a glance. Anything shown in orange is a troubleshooting lead. Two useful buttons: Check for interfering apps (lists known conflicts) and Check for updates (Could save you a few minutes if you know an update came out).
Reading the performance overlay
Enable it in Streaming → Advanced and hide it by clicking both thumbsticks.
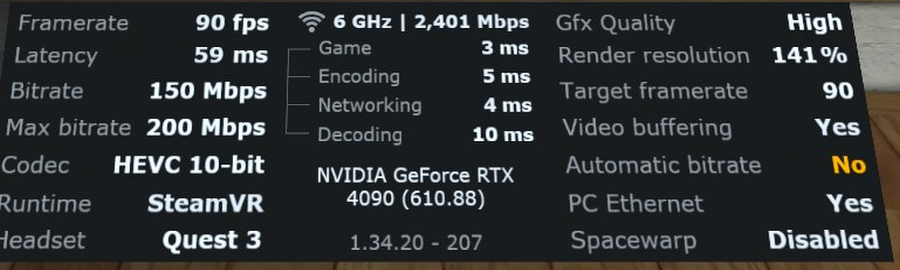
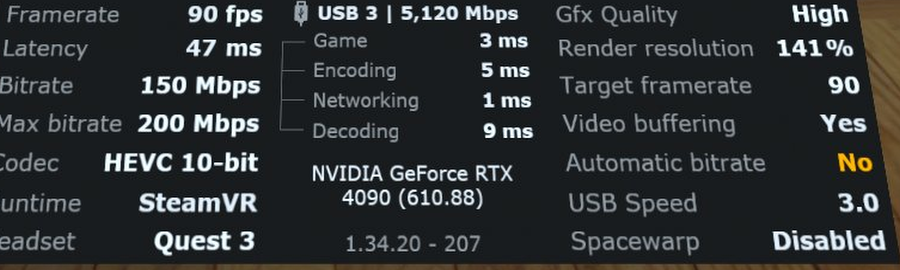
The left column shows frame rate, then latency, the total motion-to-photon delay, bitrate, and the current stream rate. The center column is headed by your connection (Wi-Fi band and link rate, or USB link speed (USB Ethernet shows Wifi still)), followed by the timing breakdown:
- Game — the PC’s render time, CPU and GPU against the frame budget your refresh rate sets. Turns orange when it exceeds that budget: the game itself is struggling. For example, at 90hz you want to stay under 11ms.
- Encoding — video compression time on your GPU. Can also climb when the network backs up. Bad drivers can cause issues here.
- Network — Wi-Fi transmission time. Should be stable and under 10 ms; orange values or a flat 0 ms both signal trouble. Wired Ethernet normally keeps it between 1 and 4 ms.
- Decoding — decompression on the headset. Spikes can also trace back to network backup.
It also shows the active codec and runtime (Oculus, SteamVR, VDXR, or VDXR+OC). Note that OpenComposite isn’t officially supported and can cause issues so expect to be asked to disable it before anyone helps troubleshoot.
What the warning signs mean:
- Orange numbers anywhere — that stage needs attention (unless several are orange at once; then look for one shared cause).
- High encoding time — bitrate too high for the network, GPU driver issues, or network dropouts.
- Network spikes — interference or weak signal; try another Wi-Fi channel.
- High decoding time — reduce bitrate on AV1/HEVC 10-bit, or switch codec to compare.
- Frame drops — lower game settings, confirm video buffering is on, and watch for network spikes. Try Ethernet or another router.
- Stuck at 45 or 72 FPS unexpectedly — look for optimizer apps forcing low Quest settings (Quest Game Optimizer) and check Quest power-saving mode; power saving is a really common cause. Really common.
Capturing it in a screenshot
When you’re asking someone else for help, a screenshot of the overlay helps, and is often required!
- In Virtual Desktop’s Settings tab, make sure Copy screenshots to desktop is enabled, so captures land on your PC instead of staying on the headset.
- Enable the overlay (Streaming → Advanced), then launch your game.
- Play until the problem shows up, and watch for numbers turning orange.
- Take the screenshot without leaving the game:
- Quest: hold the Oculus button on the right controller and pull either trigger. If the shortcut doesn’t work, press the Oculus button once and tap the camera icon on the menu.
- Pico Neo 3: press the Pico button on the controller, then the screenshot (scissors) button.
- Pico 4: press the screenshot button on the right controller.
The image shows up in your PC’s Desktop folder by default.
Troubleshooting
Known issues
- Quest Pro: “Unable to validate identity” (since May 2026) — Meta broke identity validation for some Quest Pro users; the fix has to come from Meta. Restarting the headset sometimes clears it, but not always.
- Quest: FPS degradation after ~30 minutes (since April 2026) — another Meta A/B test, hitting random users from v81 to v203. Changing codec, switching between desktop and VR mode, or reconnecting buys you another 30 minutes. Meta is still looking into it. The Virtual Desktop beta has a workaround.
- High decoding times on NVIDIA — AV1/HEVC encoding at high bitrates can spike decoding, networking, and encoding times; still under investigation. Use HEVC 10-bit at up to 150 Mbps, or drop AV1 to around 120 Mbps.
- USB streaming: disconnects or hiccups on cheap cables — low-quality USB 3 link cables (the cheap Amazon ones: AMVR, Maxonar, INIU, Syntech, and similar) cause frequent disconnections and freezes, with Intel-CPU machines hit hardest, plus encoding/network hiccups every 20 seconds once you’ve streamed for a while. You might get lucky with one, but it’s not guaranteed. Fix: a quality USB 3 cable (official Meta Link cable, LTT Truespec), a USB 2 cable at around 150–200 Mbps, or a USB Ethernet adapter to avoid the PC’s USB ports entirely.
- Windows 11 24H2: dark desktop image — if the desktop looks darker than usual when streaming, toggle your monitor’s color depth between 8 bpc and 10 bpc in the NVIDIA Control Panel or AMD software, and make sure “Automatically manage color for apps” is disabled in Windows Display Settings, under Color Profile.
- Galaxy XR: passthrough environment drops frame rate — the December 2025 OS update fixed the low-resolution screens in passthrough but the headset no longer holds frame rate there. Reported to Google; no fix date.
- Galaxy XR: poor frame rate, or throttling to 72 FPS — headset performance is inconsistent. Make sure the room is well lit, and try disabling location services in the headset settings.
GPU drivers
Newer isn’t always better for streaming (sadly). These are the community-tested drivers.
- NVIDIA GPUs: 610.62 (newer versions prevent virtual monitors from working when HAGS is enabled).
- AMD RX 5000/6000: 25.3.1 as newer versions have frame-pacing issues.
- AMD RX 7000/9000: 26.3.1.
- AMD RX 400/500/Vega: 20.10.1 as newer versions can have HEVC crashes.
When switching drivers, do it cleanly with Display Driver Uninstaller (DDU): download DDU and your target driver, boot into Safe Mode, run DDU, select your GPU type, click “Clean and restart,” then install the new driver. It prevents the driver conflicts behind many encoding crashes. You can try switching drivers without it, but if that doesn’t help, you may end up doing this anyway.
Can’t connect, or keeps disconnecting
The usual culprits are “security” and network-boost programs. Known offenders worth uninstalling: Avast, AVG, Norton, Asus GameFirst V, Bitdefender VPN, Lenovo Nerve Sense, and Lenovo Vantage’s Network Boost.
Cloud PC won’t connect (double NAT)
Double NAT blocks Virtual Desktop from reaching Shadow and other cloud PCs. If you can’t get a public IP from your ISP, a VPN can create the direct tunnel instead. With Tailscale:
- Install Tailscale on the cloud PC.
- Sideload the Tailscale APK onto your headset with SideQuest.
- Follow Tailscale’s get-started guide to sign both machines into the same network, then connect from the Computers tab as usual.
Streamer won’t install or update
Windows ships several layers that can block the installer, and some antivirus programs flag it. That’s a false positive: the installer is signed, and its packaging tooling occasionally trips antivirus heuristics. Work through these:
- Smart App Control — Windows refuses to install apps it rates “untrusted” while this is on, so setup can fail mid-install or the installer may not open at all. In Windows Security (Start menu, type “Smart App Control”), set it to Off, and rerun setup.
- Potentially Unwanted App blocking — Start menu, type “reputation,” open Reputation-based Protection, and turn off Potentially Unwanted App Blocking.
- App installation policy — Start menu, search “Choose where to get apps,” and set it to Anywhere.
- Still stuck, or the app won’t uninstall or update? Contact Virtual Desktop support.
Removing the audio drivers on macOS
To take the Streamer’s audio drivers off a Mac, paste this into a terminal, then reboot:
sudo rm -rf /Library/Audio/Plug-Ins/HAL/VirtualDesktopBlackHole.driver /Library/Audio/Plug-Ins/HAL/VirtualDesktopMicrophone.driver /Library/Audio/Plug-Ins/HAL/VirtualDesktopSpeakers.driverSteamVR error 475, or games won’t launch
In order: restart the PC; remove conflicting software (known offenders: Surfshark VPN, Proton VPN, McAfee, ESET, WebRoot, Malwarebytes, Private Internet Access, PunkBuster, Riot Vanguard); disable SteamVR add-ons like ALVR and VR Input Emulator; reinstall the Visual C++ Redistributable; and finally run the Streamer as administrator.
Stuck at 33 FPS in SteamVR games
Close Steam and SteamVR completely, then delete these three files:
C:\Program Files (x86)\Steam\steamapps\common\SteamVR\resources\settings\default.vrsettingsC:\Program Files (x86)\Steam\config\steamvr.vrsettingsC:\Program Files (x86)\Steam\config\lighthouse\lighthousedb.json
Then uninstall SteamVR from your Steam library, delete whatever remains in the SteamVR install folder, and reinstall it.
Screen too dark
Check, in order: your monitor isn’t in 10-bit color, Windows Night Mode is off, no third-party software is managing display color, and the Screen Brightness slider in the Settings tab.
Screen corruption
Visual artifacts usually trace to integrated graphics drivers, even when you’re gaming on a dedicated GPU. Update Intel integrated graphics with the Intel Driver & Support Assistant or AMD integrated graphics from the AMD driver page, then restart.
Headset microphone stopped working
Check that Microphone Passthrough is still enabled in the Settings tab of the headset app. Some headsets silently switch it off during boot. Also, on Quest you can mute the mic on the system in quick settings.
Game-specific fixes
Half-Life: Alyx stutters
In Steam, right-click the game → Properties → Launch Options, and paste:
+vr_fidelity_level_auto 0 +vr_fidelity_level 3
Beat Saber stutters
Use VDXR as the runtime (versions 1.30+), and H.264 for the lowest latency. Then keep the game from supersampling on top of your quality preset:
- Set SteamVR render resolution to Custom 100%, global and per-app.
- Drop MSAA to 2x.
- Set render scale to 1.0.
Roblox in VR
Set SteamVR as the default OpenXR runtime, launch SteamVR from the Virtual Desktop menu, disable “Compatibility layer for OpenXR Plugin” under SteamVR’s OpenXR API-layer settings, then launch Roblox from the desktop and toggle its VR mode. Expect bugs; Roblox’s VR support is rough.
WRC jitters or ghost inputs
Switch the runtime to VDXR for the stutter. For phantom inputs, disable hand tracking in Virtual Desktop’s Input settings (hand tracking can fight the wheel or gamepad).
Device support at a glance
The app, its tabs, and nearly every setting are identical across headsets. The hardware decides the rest.
- AV1 decoding needs the newer generation of chipset: Quest 3, Quest 3S, Pico 4 Ultra, Play For Dream MR, and Galaxy XR. Older headsets stream H.264 and HEVC only.
- Eye and face tracking forwards from the Quest Pro, Play For Dream MR, and Galaxy XR. Pico 4 Pro, Pico 4 Enterprise, Vive Focus Vision, and Vive XR Elite forward eye tracking only, with no face tracking on any of them.
- Body tracking is built into every Quest except the original Quest 1; Pico 4 and Pico 4 Ultra support it with Pico Motion Trackers.
- Synchronous Space Warp works on any XR2-class chip or newer (every supported headset except the original Quest).
| Device | Max frame rate | Max monitors |
|---|---|---|
| Quest 3 | 120 Hz; 144 Hz on beta | 3 |
| Quest 3S | 120 Hz | 3 |
| Quest Pro | 90 Hz | 2 |
| Quest 2 | 120 Hz | 2 |
| Pico 4 Ultra | 90 Hz | 3 |
| Pico 4 | 90 Hz | 2 |
| Pico Neo 3 | 90 Hz | 2 |
| Vive Focus 3 / XR Elite | 90 Hz | 2 |
| Vive Focus Vision | 90 Hz | 3 |
| Play For Dream MR | 90 Hz | 3 |
| Galaxy XR | 90 Hz | 3 |
The original Quest still streams (60–72 Hz, a single monitor, 100 Mbps of VR bitrate and 120 Mbps of desktop bitrate), but none of the newer features above apply to it.